How to setup VueJS 3 with Vite, Typescript, UnoCSS, ESLint (flat config) and Prettier
A year later ESLint 9 configuration has changed to something they are calling a flat file. This article uses this new format. If you’re more comfortable with the old ESLint config, please read this version.
I’m still using PNPM, but you can use NPM or YARN. Let’s start by opening a terminal and typing:
pnpm create vite todosIt will ask you a couple of questions. The first one is what framework do you want to use. Since this is a VueJS tutorial, we will go with VueJS. The second one is if you want to use Typescript. We will select Typescript for this project.
Now we move into our brand new folder todos.
cd todos
pnpm install
pnpm dev
This will start the vite server on http://localhost:5173


Let’s continue by adding UnoCSS. This is an alternative to TailwindCSS. The reason that I use UnoCSS instead of TailwindCSS is because it’s faster, but there’s a lot more to it. Anthony Fu (author of UnoCSS) dives into it on this post.
To add it to our project you would just need to run the following command on the terminal:
pnpm add -D unocssThere’s a few extra packages that I use on my projects to be able to use icons, fonts and slightly formatted forms fields. I add them by running the following:
pnpm add -D @iconify/json @julr/unocss-preset-forms \
@unocss/preset-icons @unocss/preset-typography \
@unocss/preset-uno @unocss/transformer-directives
We need to add a CSS Reset to make it render the same on any browser
pnpm add @unocss/resetWe configure UnoCSS in our vite project by modifying the vite.config.ts file, adding the uno.config.ts file and adding it to our src/main.ts file. Let’s start by modifying the vite.config.ts file at the root of our project.
// vite.config.ts
import vue from '@vitejs/plugin-vue'
import UnoCSS from 'unocss/vite'
import { defineConfig } from 'vite'

// https://vitejs.dev/config/
export default defineConfig({
  plugins: [vue(), UnoCSS()],
})
Then we create the uno.config.ts file right next to the vite.config.ts file
// uno.config.ts
import {
    defineConfig,
    presetIcons,
    presetTypography,
    presetUno,
    presetWebFonts,
    transformerDirectives
} from 'unocss'
import { presetForms } from '@julr/unocss-preset-forms'

export default defineConfig({
    presets: [
        presetIcons({
            extraProperties: {
                display: 'inline-block',
                'vertical-align': 'middle'
            }
        }),
        presetForms(),
        presetUno(),
        presetTypography(),
        presetWebFonts({
            provider: 'google',
            fonts: {
               sans: 'Open Sans:100,200,300,400,500,600,700'
            }
        })
    ],
    transformers: [transformerDirectives()]
})
And finally we modify the src/main.ts file:
// src/main.ts
import '@unocss/reset/tailwind.css'
import 'virtual:uno.css'
import { createApp } from 'vue'
import App from './App.vue'
import './style.css'

createApp(App).mount('#app')
We add the first 2 lines. The first one is to reset the browser CSS and the second one adds UnoCSS to our project.
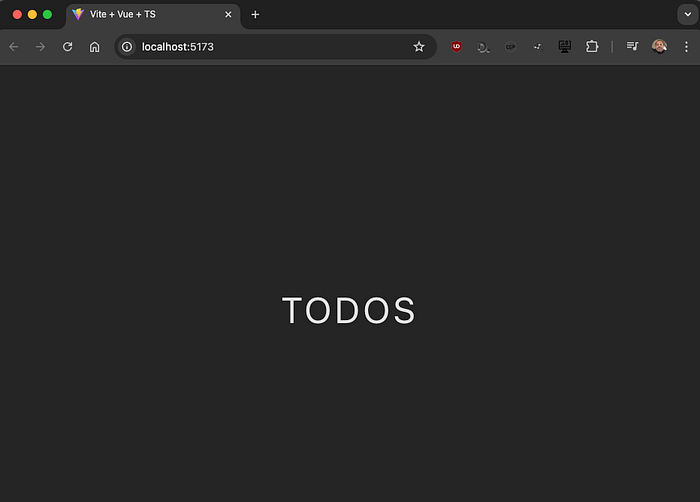
UnoCSS is now configured! Let’s test it by modifying our src/App.vue to the following:
<template>
  <div class="container mx-auto max-w-prose p-2 min-h-screen flex items-center justify-center">
    <h1 class="text-5xl tracking-widest">TODOS</h1>
  </div>
</template>
If our server has been stopped, please restart it with:
pnpm devOnce the server is running we can check if UnoCSS is working by navigating a browser to: localhost:5173
Ok, now that we have UnoCSS working is time to shift our focus to ESLint. We install it by running the following command on our terminal:
pnpm add -D @eslint/js @typescript-eslint/eslint-plugin \
@typescript-eslint/parser eslint-plugin-vue eslint \
globals typescript-eslint
And we configure by creating an eslint.config.js file alongside the vite.config.ts and uno.config.ts files:
// eslint.config.js
import pluginJs from '@eslint/js';
import pluginVue from 'eslint-plugin-vue';
import globals from 'globals';
import tseslint from 'typescript-eslint';

export default [
    { files: ['**/*.{js,mjs,cjs,ts,vue}'] },
    { languageOptions: { globals: globals.browser } },
    pluginJs.configs.recommended,
    ...tseslint.configs.recommended,
    ...pluginVue.configs['flat/recommended'],
    {
        files: ['**/*.vue'],
        languageOptions: {
            parserOptions: { parser: tseslint.parser }
        }
    },
    {
        rules: {
            'vue/multi-word-component-names': 'off',
            '@typescript-eslint/no-unused-expressions': [
                'error',
                {
                    allowShortCircuit: true,
                    allowTernary: true
                }
            ]
        }
    }
];
This will configure ESLint in your project. If you open your project on an IDE that supports it, like VSCode, and open the src/App.vue file you’ll notice that the IDE is telling you that it wants the H1 tags to be on it’s own lines. And you maybe asking why. Isn’t ESLint for JavaScript? That HTML Template is VueJS code and since we also installed the VueJS ESLint plugin, it will also check the HTML Template.
If you’re using VSCode, then you can configure your project to fixable ESLint issues on save. To do this, you’ll need to create the .vscode/settings.json file and add the following lines:
{
    "eslint.validate": ["vue", "javascript", "typescript"],
    "editor.codeActionsOnSave": {
        "source.fixAll.eslint": "always",
        "source.fixAll.stylelint": "always"
    },
    "editor.quickSuggestions": {
        "other": true,
        "comments": false,
        "strings": true
    }
}
Now that this is configured, if you open your src/App.vue file again and save it. The H1 tag issue is going to be solved automatically.
Let’s add Prettier to the mix. This tool only focuses on the HTML side of things. Having this tool helps me format my HTML more than finding errors in it. If you don’t want this, you can skip it.
pnpm add -D eslint-config-prettier eslint-plugin-prettier prettierAnd we configure by creating a .prettierrc file in the root of our project:
{
    "semi": true,
    "singleQuote": true,
    "tabWidth": 4,
    "trailingComma": "none"
}
And making it work together with ESLint by modifying the eslint.config.js file
import pluginJs from '@eslint/js';
import eslintPluginPrettier from 'eslint-plugin-prettier/recommended';
import pluginVue from 'eslint-plugin-vue';
import globals from 'globals';
import tseslint from 'typescript-eslint';

export default [
    { files: ['**/*.{js,mjs,cjs,ts,vue}'] },
    { languageOptions: { globals: globals.browser } },
    pluginJs.configs.recommended,
    ...tseslint.configs.recommended,
    ...pluginVue.configs['flat/recommended'],
    {
        files: ['**/*.vue'],
        languageOptions: {
            parserOptions: { parser: tseslint.parser }
        }
    },
    eslintPluginPrettier,
    {
        rules: {
            'vue/multi-word-component-names': 'off',
            '@typescript-eslint/no-unused-expressions': [
                'error',
                {
                    allowShortCircuit: true,
                    allowTernary: true
                }
            ]
        }
    }
];
I don’t like to have semicolons in my JavaScript code, but there’s a plugin in my VSCode that conflicts with this ESLint/Prettier setup, and it ends up adding it to JavaScript imports, and ESLint/Prettier is always telling you that there’s something wrong with your code, you save it, it takes it off, and the plugin puts it back in. It’s frustrating! So, I decided to turn on semicolons, and let VSCode add them on save.
Since I use UnoCSS, I don’t do much CSS. I use it to style all my heading tags, background, form fields, animations. Well, now that I think of it, I do use it, but, I have one CSS that I share between projects and I don’t have to work on it too much.
I have a linter setup for CSS called Stylelint. If you want to use it, you’ll need to run the following in the terminal at the project’s root:
pnpm add -D stylelint stylelint-config-prettier \
stylelint-config-recommended stylelint-prettier
And configure it by creating a .stylelint.json file at the root of the project:
{
    "extends": [
        "stylelint-config-recommended",
        "stylelint-prettier/recommended"
    ],
    "rules": {
        "at-rule-no-unknown": [
            true,
            {
                "ignoreAtRules": [
                    "tailwind",
                    "apply",
                    "variants",
                    "responsive",
                    "screen"
                ]
            }
        ],
        "no-descending-specificity": null
    }
}
Since we’ve installed the plugin that integrates it with prettier, then that’s all we need to do to have it installed.
This is my starting point for all my VueJS projects. Hope it’s useful!
